
Electrical Insights
Electrical Tips & Guides
Expert advice from licensed electricians serving Northern Virginia. Stay informed about EV charging, panel upgrades, smart home technology, and electrical safety.
Featured Articles

Featured
Home Safety
24-Hour Emergency Electrician in Fairfax, VA — What to Expect
Electrical emergencies don't wait for business hours. Learn what to expect when you call a 24-hour emergency electrician in Fairfax, VA — response times, costs, and how to stay safe until help arrives.
9 min readMar 15, 2026
Read More 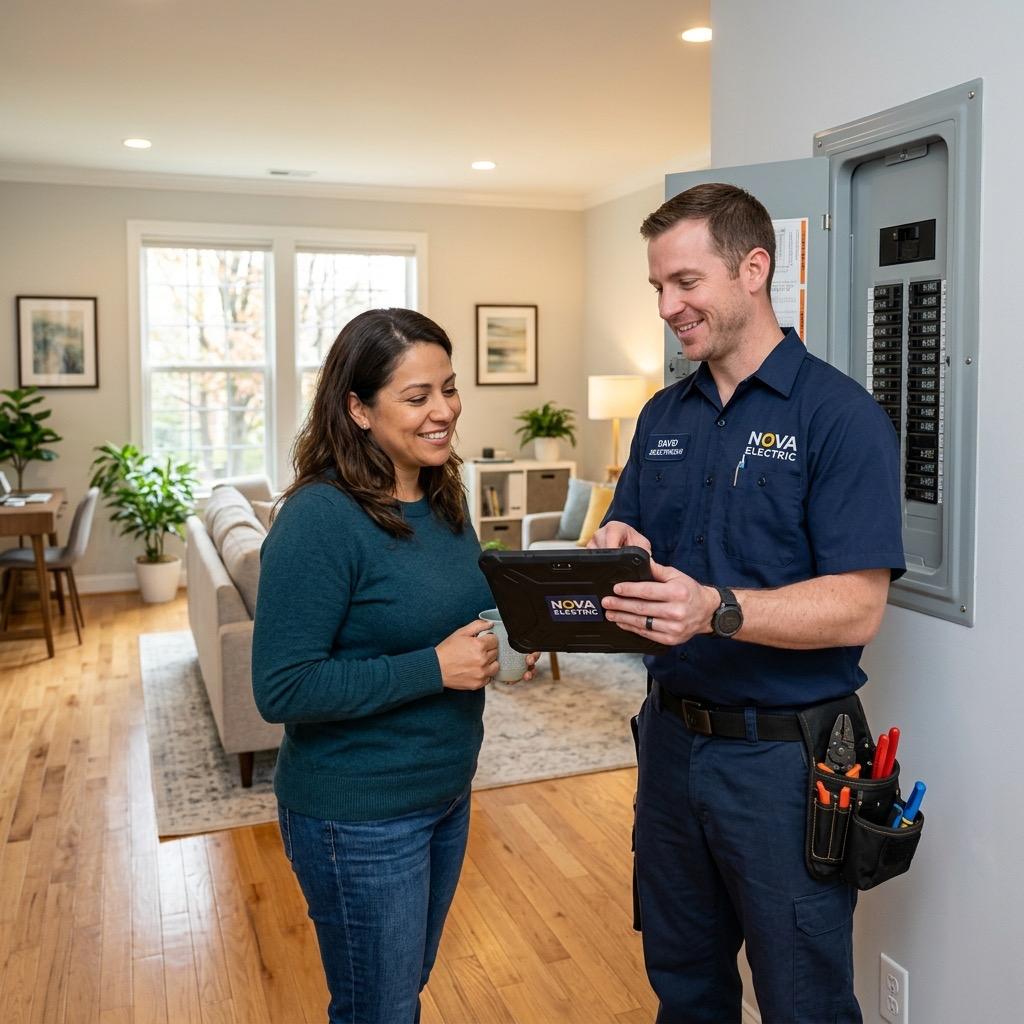
Featured
Home Safety
How to Choose the Best Electrician in Northern Virginia (2026 Checklist)
Not all electricians are equal. Use this 2026 checklist to verify licenses, check reviews, compare quotes, and hire the right electrician for your Northern Virginia home or business.
9 min readMar 12, 2026
Read More 
Featured
Generators
Backup Power for Homes with Medical Equipment: A Complete Guide
If someone in your home relies on medical equipment, backup power is not a luxury—it is a necessity. Learn how a battery power station and a portable generator keep CPAP, oxygen, and other life-sustaining devices running.
3 min readJan 22, 2026
Read More Latest Articles

Spring Storm Damage: When Your Home Needs an Electrical Inspection
Spring storms can cause hidden electrical damage that creates fire and shock hazards. Learn the warning signs that indicate your home needs a professional electrical inspection after severe weather.
3 min read
Read 
Electrical Permit Costs by County: Fairfax, Loudoun, Prince William, Arlington
Exact electrical permit fees for every major Northern Virginia county, how the fee structures work, what triggers a permit, and what to expect during the inspection process in 2026.
8 min read
Read 
Copper vs Aluminum Wiring: Safety, Cost & What Virginia Code Says
Copper or aluminum wiring in your Northern Virginia home? This comprehensive guide covers the safety differences, Virginia electrical code requirements, remediation options, and what buyers and sellers need to know about aluminum wiring in the DMV real estate market.
10 min read
Read 
Home Safety
Derecho Aftermath: Electrical Safety Checklist for Northern Virginia
Derechos hit Northern Virginia with little warning and leave widespread electrical damage in their wake. Use this comprehensive post-derecho electrical safety checklist to protect your home and family before restoring power.
9 min read
Read 
Generators
Backup Power Maintenance Checklist for NoVA Homeowners
A portable generator needs regular care to start every time; a battery power station needs almost none. This maintenance checklist covers both, with timing guidance specific to the Northern Virginia climate.
8 min read
Read 
Home Safety
Why Family-Owned Electricians Outperform National Chains in NoVA
National electrical chains dominate advertising, but family-owned contractors consistently deliver better results for Northern Virginia homeowners. Here's the data and the reasons why.
9 min read
Read 
Home Safety
Weekend Electrical Emergency in Prince William County — Who to Call
Electrical problems don't wait for Monday. If you're dealing with a Saturday night electrical emergency in Prince William County — Manassas, Woodbridge, Dale City, or Gainesville — here's exactly who to call and what to do.
9 min read
Read 
Whole-House Surge Protector vs Power Strip: What Actually Protects Your Home?
Wondering if your power strips are enough to protect your electronics and appliances? This guide compares whole-house surge protection vs individual power strips and explains what Virginia homeowners actually need to safeguard their investments.
9 min read
Read 
Hidden Costs of Electrical Work: What Northern Virginia Homeowners Should Know
The quoted price is rarely the final price for electrical work. Learn the 12 most common hidden costs in Northern Virginia electrical projects and how to protect yourself before signing any contract.
8 min read
Read 
Home Safety
Licensed vs Unlicensed Electricians in Virginia: Risks You Need to Know
Hiring an unlicensed electrician in Virginia is never worth the risk. Learn the legal, financial, and safety consequences -- and how to protect yourself before you hire.
9 min read
Read 
Home Safety
Burning Smell from Outlet? Emergency Steps for NoVA Homeowners
A burning smell from an outlet is never normal and always requires action. This step-by-step guide tells NoVA homeowners exactly what to do right now — from shutting off the circuit to when you need to evacuate and call 911.
9 min read
Read 
Generators
Do I Need Backup Power in Northern Virginia? 5 Questions to Decide
Backup power is a meaningful investment. These 5 diagnostic questions help Northern Virginia homeowners decide whether they need a battery power station or a portable generator hookup - and which fits best.
8 min read
Read 
Home Safety
Storm Damage Electrical Repair in Loudoun County: Response Times & Costs
Thunderstorms, derechos, and nor'easters routinely damage electrical systems across Loudoun County. Here's what storm-related electrical damage looks like, realistic repair costs, how insurance works, and who responds fastest.
9 min read
Read 
LED vs Fluorescent Lighting for Commercial Spaces in Northern Virginia
Comparing LED and fluorescent lighting for commercial spaces in Northern Virginia? This guide covers energy savings, maintenance costs, light quality, and the ROI of switching from T8 or T12 fluorescent to LED for offices, warehouses, and retail in the DMV region.
9 min read
Read 
How Much Do Electricians Charge Per Hour in Virginia? 2026 Rates
Current 2026 electrician hourly rates across Virginia, with detailed breakdowns for Northern Virginia, Richmond, Hampton Roads, and rural areas. Includes service call fees, emergency rates, and flat-rate pricing data.
8 min read
Read 
Home Safety
What Makes a Great Electrician? A Master Electrician's Perspective
What separates good electricians from great ones? AJ Long Electric's master electrician breaks down the qualities, habits, and standards that define true excellence in the trade.
9 min read
Read 
Home Safety
Electrical Fire Prevention: A Northern Virginia Homeowner's Guide
Electrical fires kill hundreds of Americans each year and destroy billions in property — and Northern Virginia's aging housing stock creates specific risks. This comprehensive guide covers prevention, detection, and what to do if a fire starts.
9 min read
Read 
Generators
Backup Power Installation Timeline in Loudoun County: Permits & Inspections
Installing backup power in Loudoun County - a portable generator hookup or a battery power station - is mostly electrical work. Here's the realistic timeline so you can plan properly.
8 min read
Read 
Home Safety
Power Outage in Northern Virginia? Here's What to Check Before Calling an Electrician
Before you call an emergency electrician for a Northern Virginia power outage, run through this quick checklist. Many outages have simple fixes — others signal a genuine electrical emergency that needs immediate professional attention.
9 min read
Read 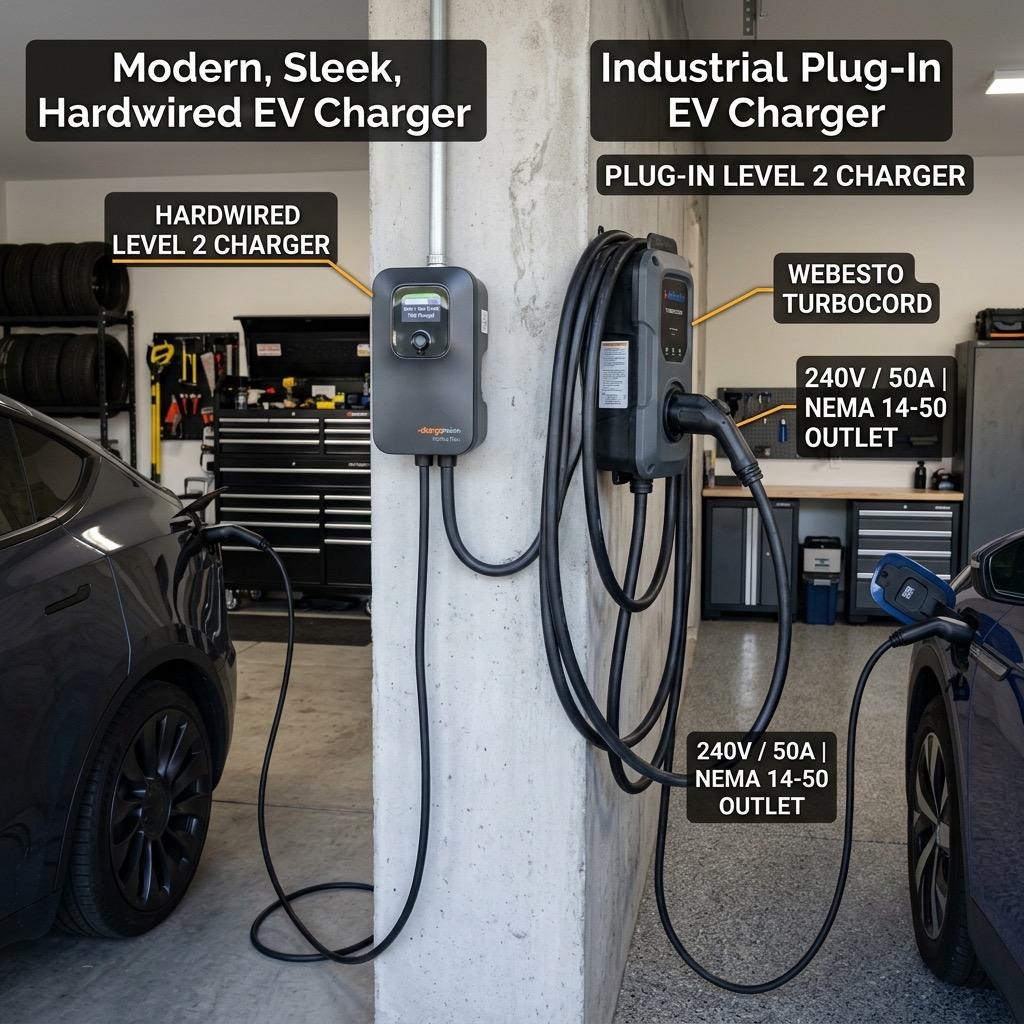
Hardwired vs Plug-In EV Charger: Pros, Cons & Costs in Virginia
Choosing between a hardwired and plug-in EV charger installation in Virginia? This guide covers charging speed, installation costs, NEC code requirements, and which approach makes sense for homeowners across Northern Virginia.
9 min read
Read 
Home Safety
Emergency Electrical Repair in Arlington: When to Call 911 vs an Electrician
Facing an electrical problem in Arlington, VA? Learn exactly when to call 911 versus an emergency electrician, what each scenario looks like, and how AJ Long Electric responds to Arlington emergencies around the clock.
9 min read
Read 
EV Charger Installation Cost in Northern Virginia: Level 1 vs Level 2 vs Level 3
Exact costs for Level 1, Level 2, and Level 3 EV charger installation in Northern Virginia. Includes permit fees, panel upgrade scenarios, tax credit details, and real project data from Fairfax, Loudoun, and Arlington.
8 min read
Read 
Generators
How Much Does Backup Power Cost in Northern Virginia? Complete 2026 Pricing Guide
Backup power costs in Northern Virginia range from about $1,400 for a portable generator hookup to $15,000+ for whole-home battery integration. This 2026 pricing guide breaks down every cost component.
8 min read
Read 
Spring Electrical Maintenance Checklist: Prepare Your Home for the New Season
Spring is the perfect time to assess your home electrical system after winter stress. Use this comprehensive checklist to identify issues, improve safety, and prepare for summer electrical demands.
4 min read
Read Browse by Category
Find articles on the topics that matter most to you.
EV Charging
EV charging covers the Level 2 home chargers and circuits that recharge an electric vehicle from your own garage or driveway. These guides walk Northern Virginia drivers through charger selection, the dedicated 240-volt circuit and panel capacity a home charger needs, permitting, and the install costs to expect. A typical Level 2 setup adds roughly 25 to 40 miles of range per hour of charging.
Panel Upgrades
A panel upgrade replaces an undersized or outdated electrical panel with a modern service that safely powers today's larger loads. These homeowner guides explain when an upgrade is required, how to move from 100-amp to 200-amp service, the warning signs of failing or recalled panels, and what permitting and inspection involve. Most Northern Virginia upgrades land between $1,500 and $4,000 depending on amperage and panel location.
Home Safety
Electrical home safety is the set of practices and devices that prevent shock, fire, and arc-fault hazards in a house. These guides cover GFCI and AFCI protection, smoke and carbon-monoxide detectors, overloaded circuits, aluminum wiring, and the inspections that catch problems early. Faulty wiring contributes to an estimated 45,000 home fires in the U.S. each year, which is why proactive checks matter.
Smart Home
Smart home technology connects lighting, outlets, thermostats, and security to app or voice control through reliable, code-compliant wiring. These articles explain smart switches and dimmers, whole-home automation hubs, structured low-voltage cabling, and the electrical groundwork a dependable smart home needs. Done right, a connected home can trim lighting and HVAC energy use by 10 to 15 percent.
Commercial
Commercial electrical work covers the power systems, lighting, and code compliance that keep offices, retail spaces, restaurants, and multi-unit buildings running. These articles address three-phase service, panel and subpanel design, dedicated circuits for commercial equipment, emergency and exit lighting, and the permitting and NEC inspections that commercial properties must pass. Most commercial projects in Northern Virginia must meet the National Electrical Code on a roughly three-year update cycle, so staying current protects both safety and your certificate of occupancy.
Energy Efficiency
Electrical energy efficiency is the practice of cutting wasted power through better lighting, smarter controls, and well-sized circuits. These guides cover LED retrofits, dimmers and occupancy sensors, energy monitoring, and load management that lowers your bill without sacrificing comfort. Switching from incandescent to LED lighting alone can reduce that lighting load by up to 75 percent.
Generators
Home backup power comes in two practical forms: a portable generator connected safely through a transfer switch, interlock kit, or inlet box, and a battery power station that stores electricity for silent, fuel-free, indoor-safe backup. These guides explain backfeed safety and carbon-monoxide precautions for portable generators, how battery stations from EcoFlow, Bluetti, and Anker SOLIX are sized in kWh and watts, and the electrical permitting an install requires. A transfer switch or interlock is required to connect a generator to your home safely and to code.
Lighting
Lighting design pairs the right fixtures, layers, and controls to make a space both functional and inviting. These articles cover interior and exterior lighting, recessed and accent fixtures, landscape and security lighting, dimming systems, and energy-efficient LED upgrades. A well-planned layout typically blends three layers of light, ambient, task, and accent, to balance comfort and utility.
Seasonal
Seasonal electrical care is the year-round maintenance that keeps a home's wiring, outlets, and outdoor circuits safe through changing weather. These guides cover holiday lighting loads, storm and outage preparation, surge protection, and warm- and cold-weather inspections tuned to the Mid-Atlantic climate. A few targeted seasonal checks each year head off the outages and hazards that peak during DMV summer storms and winter cold snaps.
Local Services
Local services are the city- and neighborhood-specific electrical guides for homeowners across Northern Virginia and the greater DMV. These articles cover permitting and inspection rules by jurisdiction, common wiring issues in older local housing stock, and what to expect from a licensed electrician in your community. AJ Long Electric serves more than two dozen cities and towns across Northern Virginia, Maryland, and Washington, D.C.
Cost & Pricing
Electrical cost and pricing guides explain what common projects actually cost and the factors that move the final number. These articles break down pricing for panel upgrades, EV chargers, rewiring, lighting, and service calls, plus how labor, materials, permits, and home age affect a quote. As a benchmark, licensed electrical labor in the Northern Virginia and DMV market typically runs between $90 and $150 per hour.
Comparisons
Comparison guides weigh competing electrical products and approaches side by side so you can choose with confidence. These articles contrast options like 100- versus 200-amp service, hardwired versus plug-in EV chargers, portable generators versus battery power stations, and LED versus traditional lighting, with the trade-offs in cost, safety, and performance laid out plainly. Each comparison names the scenario where one option clearly wins so the decision is straightforward.
FAQ
This FAQ collection gives direct, in-depth answers to the electrical questions Northern Virginia homeowners ask most. The articles explain code requirements, safety concerns, project timelines, permitting, and when to call a licensed electrician, written so a homeowner can act on the answer. Every answer reflects current National Electrical Code guidance and real field experience from licensed DMV electricians.
Need Electrical Help?
Our licensed electricians are ready to help with any electrical project, from EV charger installations to complete panel upgrades.